In my continuing efforts to capture the last few moments of summer, I decided it was high time to finally try out this unbelievably simple ice cream recipe I came across on Epicurious recently. No-churn. 3 ingredients. WHAT?! Does it get any simpler than that?? You want easy, quick, and delicious? This one’s for you!
Confession: When people ask me what my favorite food is, I reply simply: “Ice cream”. They always chuckle at my “joke” (…?), and then wait politely for my real answer. I then smile sweetly until they incredulously realize that I was serious – ice cream truly is the one food I would choose to eat if offered a “last supper” before I die. Like, it’s the food I would eat 3 meals a day if it wouldn’t make me ridiculously sick (and large). Like, I would choose a good bowl of ice cream over a good bar of fine chocolate. (As my husband reads that sentence, he’s probably starting to question our compatibility.) Of course, the ultimate is to marry a killer ice cream with killer chocolate (ie. Graeter’s Double Chocolate Chip (gosh, I love living in Cincinnati!), or our newest favorite: Kroger Private Selection Ultimate-Maximum-Extreme-Blow-Your-Mind Denali Fudge Moose Tracks. Seriously. Go out and get it today.)
Of course, me being me, I like to try to make delicious things myself. But ice cream is one thing I haven’t forayed into much. For one thing, it takes TIME. And when I’m craving ice cream, I want it NOW. And I never think ahead enough to say, “Hmm…I think I might crave ice cream in 8-12 hours. Better whip some up now in preparation for that particular moment!” I mean, when making it, you have a minimum of many hours of freezing time. In addition to that, many ice creams require you to heat the ingredients (either for melting or cooking) first, THEN you have to cool them, THEN you freeze them. Sheesh! By the time I’m done, I’ve lost patience and already made 3 other treats to satisfy my treat craving. And by that time I don’t want the ice cream anymore, I want to go to the gym to indulge in a guilt-driven erase-those-calories workout. Booh.
Secondly: the best ice creams (in my opinion) have a custard base. We recently had a homemade “sweet cream” at a friend’s house – just cream, eggs, sugar – and it had the most AMAZING flavor. I couldn’t believe nothing else was in it – no vanilla, nothing! If I wasn’t converted before, I am now – egg-based custards make the BEST homemade ice cream. BUT – custard requires cooking eggs, which requires a double boiler, and you know how I feel about double boilers. So…not much ice cream making happening in this little house of mine.
But recently I came across the simplest of recipes for homemade ice cream – no churn, and only 3 ingredients. AND it’s a salted caramel ice cream. Salted caramel is to me what chocolate is to my husband. I’m a sucker for anything salted caramel. AND – it uses dulce de leche*. Que riiiiiccoooo!!! I lived in Chile for 18 months, and down there they use dulce de leche (they call it “manjar”) like we use peanut butter. But you’re spreading gooey milky silky caramel on your toast, fruit, pastries…<longing sigh…>
With such a simple recipe, and using this favorite ingredient, I’ve been dying to try this! And with such a beautiful sunny day outside, I decided I couldn’t put it off any longer.
I’ll admit, I was skeptical – I wasn’t convinced that I’d get a smooth, creamy texture by simply freezing whipped cream. I mean, come on – that’s WAY too easy. If it were that easy, why didn’t everyone know about this? And why hadn’t I tried this years ago? I figured it would have lots of ice crystals and be quite hard or grainy/crunchy. Perhaps my opinions were flavored by an NPR story I heard a while back about making ice cream. Absolutely intriguing. (And solidified my opinion that egg-based custard ice creams are ‘da BEST’.) (Sidenote: I don’t think I’ve ever listened to an NPR story more intently!)
But I gave it a try. I whipped up that whipping cream, folded in the dulce de leche, and stuck it in the freezer. Less than 4 hours later I was dying to know how it turned out! I opened the lid, took a spoon and – voila! Ice cream! I was impressed with how creamy it was – no ice crystals, just smooth, velvety ice cream!
I’m interested to try it again, replacing the dulce de leche with other add-ins (hot fudge (chilled), lemon custard, coconut extract with flakes of toasted coconut). I’ve also seen in some recipes that you can replace whipped cream with whipped coconut cream (the solid stuff in a can of coconut milk). I’ve tried whipping it up once and it went horribly, but I’m willing to try it again! Anyone done it successfully? If so, teach me your ways!!
Not convinced? Capture those last moments of the fading summer and give it a try! Step-by-step photos below, full recipe at the bottom. If you whip it up now, it’ll be ready for a midnight snack tonight! 😉 Que disfrute!
Some step-by-step photos below, followed by the recipe.
- Empty the dulce de leche into a bowl. Stir in the salt.
- I found it helpful to thin it slightly so it was easier to fold into the cream (learned this from one of my friends in Chile!). To do this, stir in hot water ½ teaspoon at a time until you reach desired consistency (mine was very thick (ie. not “pourable”, only “scoop-able”), so I added about 2-3 teaspoons of water until it was pourable).
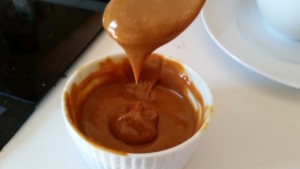
- I found it helpful to thin it slightly so it was easier to fold into the cream (learned this from one of my friends in Chile!). To do this, stir in hot water ½ teaspoon at a time until you reach desired consistency (mine was very thick (ie. not “pourable”, only “scoop-able”), so I added about 2-3 teaspoons of water until it was pourable).
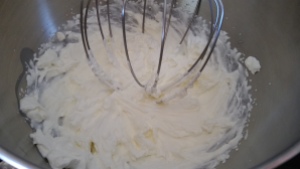
- Whip 2 cups of whipping cream until stiff peaks form (or a little bit more…just don’t turn it into butter!). Make it easy on yourself by using VERY cold whipping cream.
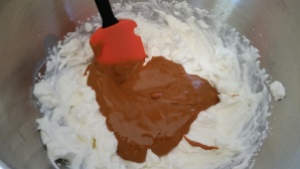
- Carefully add the dulce de leche mixture to the whipped cream. Gently fold in until mixed completely.
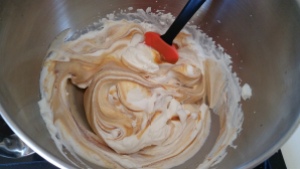
- Pour into an airtight container, then immediately bury it in the coldest part of your freezer. (That NPR story said that much of the creaminess of your ice cream has to do with how quickly it freezes. The quicker the better!)
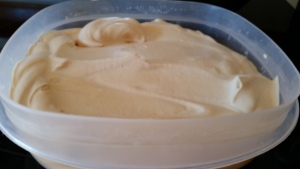
- Wait 2-4 hours (the hardest part of this recipe!), then pull it out and enjoy as-is, or top it off with caramel sauce and a sprinkle of salt for an extra-indulgent treat!
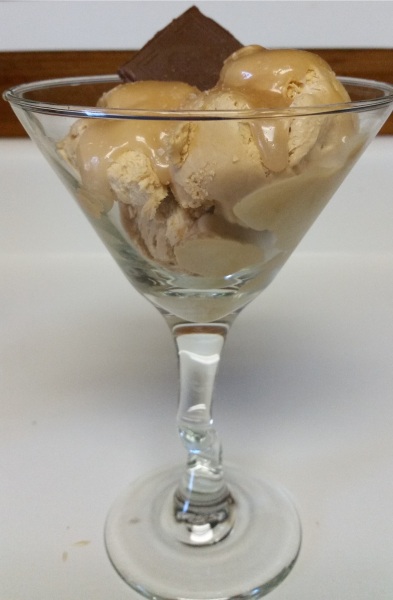
*Note: If you aren’t familiar with dulce de leche (pronounced “DULL-say day LEH-chay”), please go buy some and become best friends with it! it’s basically caramelized sweetened condensed milk. It’s usually a nice medium- to dark-tan color. The kind I’ve found here in the US comes in cans and is pretty thick. In South America, they have as many different brands as we do in the U.S. for peanut butter. You can make it yourself from a can of sweetened condensed milk, either in the oven, microwave, stovetop, or even slow cooker. But it takes TIME (seeing a pattern here? Not the most patient person…even for food…). I’ve tried 2 different methods, and I much prefer to just buy a can of dulce de leche from the Hispanic section at my local supermarket.
3 Ingredient Salted-Caramel Ice Cream
Ingredients:
2 cups cold whipping cream
1 (14 oz) can dulce de leche (found in Hispanic section at grocery store)
½ tsp salt (or more, depending on taste)
Directions:
- Empty the dulce de leche into a bowl. Mix in hot water, ½ teaspoon at a time, until it gets to a “pourable” consistency (generally takes 2-4 teaspoons for me).
- Add salt to the dulce de leche; stir to combine.
- Using an electric mixer, beat the whipping cream (make sure it’s COLD) at least until stiff peaks form (I did it a few moments longer to give it more stability, but not long enough to lose the fluffy airiness of it).
- Make a well in the middle of the whipped cream, and gently pour in the dulce de leche mixture. Very gently fold together until no streaks remain.
- Pour into a container (ex. tupperware, 9 x5 loaf pan), seal, and put in the coldest spot of your freezer.
- Let freeze 2-4 hours (4 hours for hard set).
- Serve as-is, or top with additional caramel sauce and flaky sea salt (I just used table salt and it was fine, but would have been AWESOME with some fancy flake salt).
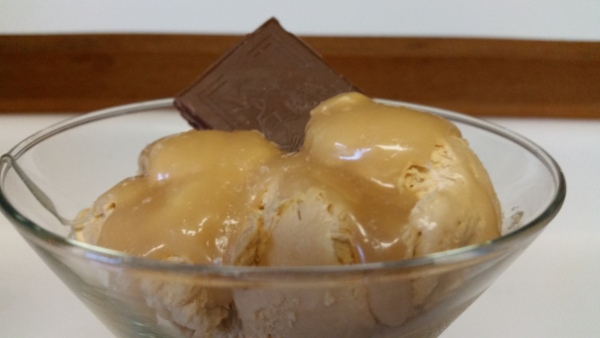

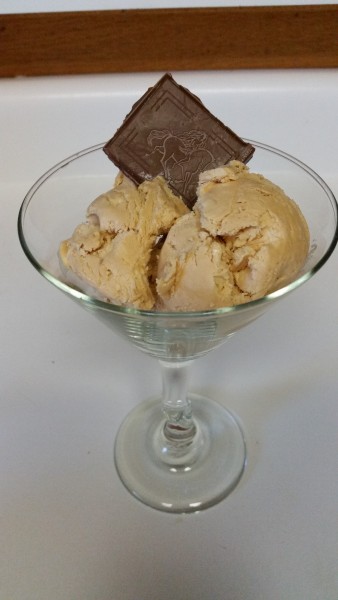


YUM!